


Hi there,
Recently, I learned how to log information during the life cycle of a .NET Core WebAPI and I'll be sharing what I learned with you.
What is Logging?
I'll start by giving an example of what Logging is: let's assume we have just deployed our web API, or we created new features and we want to observe the various types of errors that can occur in our API. we might want to keep records of certain operations being performed on our API and we require a place to store this information over time, this is where logging comes in. Also, Logging helps us keep track of issues that may arise in our web API in any environment(development or production) by having these errors stored somewhere or we can get notified via email.
NLog
There are many libraries and frameworks for Logging in the .NET platform, but in this article, however, I would be discussing NLog only. NLog is a library that enables us to add sophisticated tracing code to our web API in order to get the best out of Logging. For example, with NLog, you can log errors, warnings, or information to either a database, a file, send them as an email, log to a Windows form Control(when using NLog with windows form applications). In addition to being able to send log messages to numerous destinations, NLog also gives the ability to pass in preferred context information to be sent to the target, for example, you can pass the current date and time of the log, the stack trace, the log level, or information about the log. There are many more applications of NLog which you can find here but we would be using the "log to file" approach in this article. Before we get started on using NLog, I would like to do a breakdown of the various levels that can be logged using NLog.
Trace Level:
These are usually very detailed log messages, they occur during Trace debugging. At this point, you're looking to capture every detail/information about how your application behaves.
Debug Level:
Less detailed compared to Trace, sometimes less frequent debugging messages.
Info Level:
Informational messages, for example, a method that has performed its task successfully, we can log it as "mail sent", or "user updated successfully".
Warn Level:
These warnings usually don't appear to the user of the application and are most times better off seen only by the backend/developers. This doesn't halt the execution of the application.
Error Level:
In this case, an execution might have failed in the API and the application may or may not continue to run.
Fatal Level:
In this case, a fatal error message is logged. After a fatal error, the application usually terminates.
Getting Started with NLog
NLog can be added to your project in any of these two ways: you can install NLog from the package manager window in your project by searching "NLog.Web.AspNetCore" and following the installation process, or you could install it from the package manager console by using the following command:
Install-Package NLog.Config
Once it's installed, we can now proceed to the next step. This requires a config file for NLog to find, it's usually saved as nlog.config, in this Nlog.config file, we would add our configuration for how we want NLog to perform its tasks on our project. A sample configuration can be found here which is as follows:
<?xml version="1.0" ?>
<nlog xmlns="http://www.nlog-project.org/schemas/NLog.xsd"
      xmlns:xsi="http://www.w3.org/2001/XMLSchema-instance">
    <targets>
        <target name="file" xsi:type="File"
            layout="${longdate} ${logger} ${message}${exception:format=ToString}"
            fileName="${basedir}/logs/logfile.txt"
            keepFileOpen="true"
            encoding="utf-8" />
    </targets>
    <rules>
        <logger name="*" minlevel="Debug" writeTo="file" />
    </rules>
</nlog>
Let's break this down a bit now, shall we? This code snippet above consists of two main sections: the targets, and the rules. In the targets, we can set multiple targets for logging, meaning we can log to multiple text files at the same time in different places. In the target tag, we have the type attribute which signifies the target type, in this case, a text file. The name attribute signifies the name of the target tag we want to use. The layout is a very important attribute to note, this would determine how the log would be displayed in the text file or wherever we set our target too. The fileName shows the name of the file we are logging to and its directory at which it is stored locally. The keepFileOn and encoding are properties that keep the file open at all times and set the encoding is set to the standard required. The other section, which is the "rules" tag, helps determine how each individual log is made, the asterisk means that all logs are allowed to be kept and the minlevel signifies the minimum level at which to start logging from, in this case. The writeTo attribute states what target we are to write our logs into.
For this article, I have created a sample controller on which we can log our errors.
        [HttpGet]
        public ActionResult<List<MeetupDetailsDTO>> Get()
        {
            var meetups = _context.Meetups
                .Include(c => c.Location)
                .ToList();

            var meetupDtos = _mapper.Map<List<MeetupDetailsDTO>>(meetups);
            return Ok(meetupDtos);
        }
This is a sample controller that returns the list of meetups in the database via a GET request. To start logging on this controller with NLog, we need to add create our nlog.config file in our root directory of the project and write our configuration in it as shown below:
<?xml version="1.0" encoding="utf-8" ?>
<nlog xmlns="http://www.nlog-project.org/schemas/NLog.xsd"
      xmlns:xsi="http://www.w3.org/2001/XMLSchema-instance">

  <!-- the targets to write to -->
  <targets>
    <!-- write logs to file  -->
    <target name="allfile" xsi:type="File"
            layout="${longdate} ${logger} ${message}${exception:format=ToString}"
            fileName="c:\DemoLogs\nlog-all-${shortdate}.log"/>
  </targets>

  <!-- rules to map from logger name to target -->
  <rules>
    <!--All logs, including from Microsoft-->
    <logger name="*" minlevel="Trace" writeTo="allfile" />
  </rules>
</nlog>
In this case, the minimum level of logging we want to do is the Trace Level, this means that all levels would be logged by NLog into our file. Next, we need to set the properties of the nlog.config file "Copy to Output Directory" to "Copy if Newer". This can be done by right-clicking on the nlog.config file, select properties, and choosing from the DropDown menu "Copy if Newer" when we find the "copy to output directory" property. This allows us to always copy a newer version of your log to the file.
Next, we call the NLog method in the Program class in our CreateHostBuilder method, this would enable NLog to be called at our application-level whenever our web API runs. Now, we're all set up, we can intentionally throw an exception in our controller to test our Logging.
        [HttpGet]
        public ActionResult<List<MeetupDetailsDTO>> Get()
        {
            //Intentional Exception being thrown here
            throw new Exception("Error logging here.");
            var meetups = _context.Meetups
                .Include(c => c.Location)
                .ToList();

            var meetupDtos = _mapper.Map<List<MeetupDetailsDTO>>(meetups);

            return Ok(meetupDtos);
        }
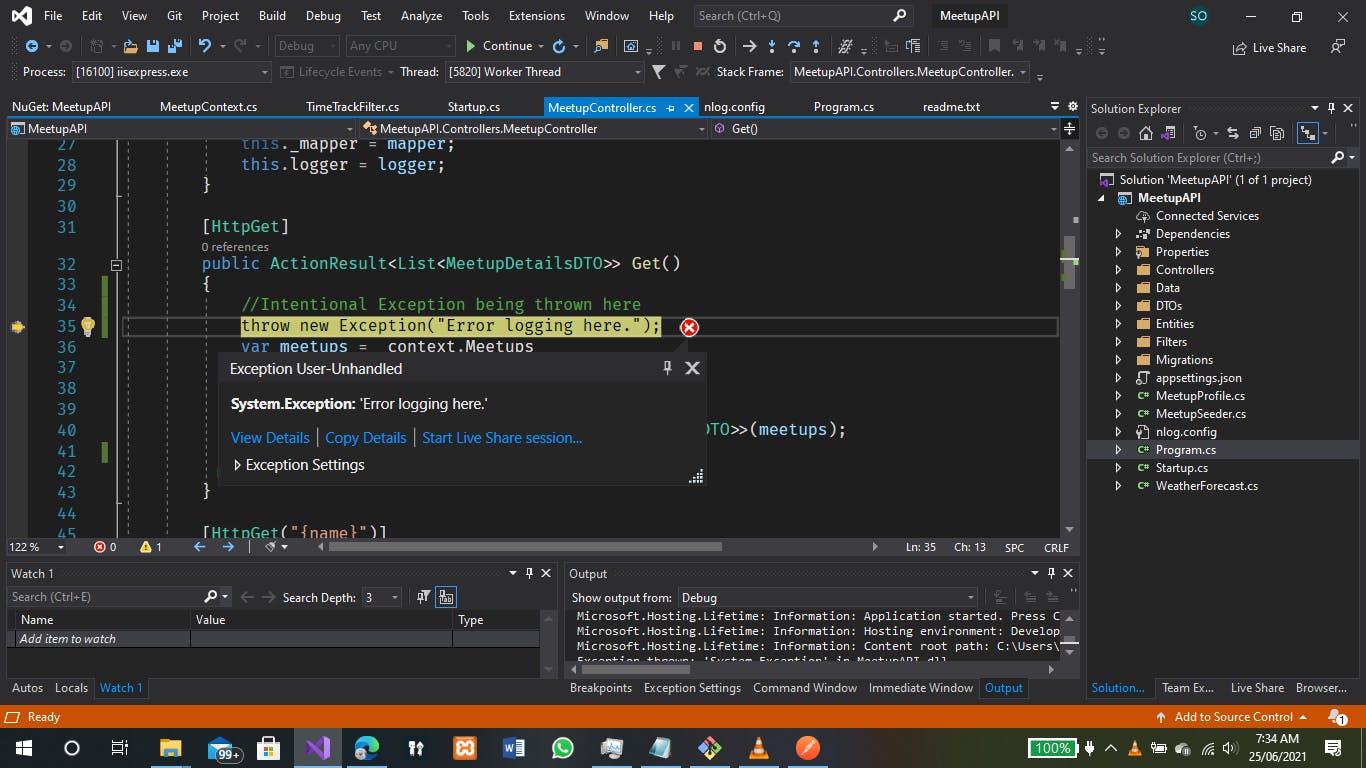
Now we run our application and call the GET endpoint from Postman, our application halts at the exception we threw earlier as shown in the picture below:
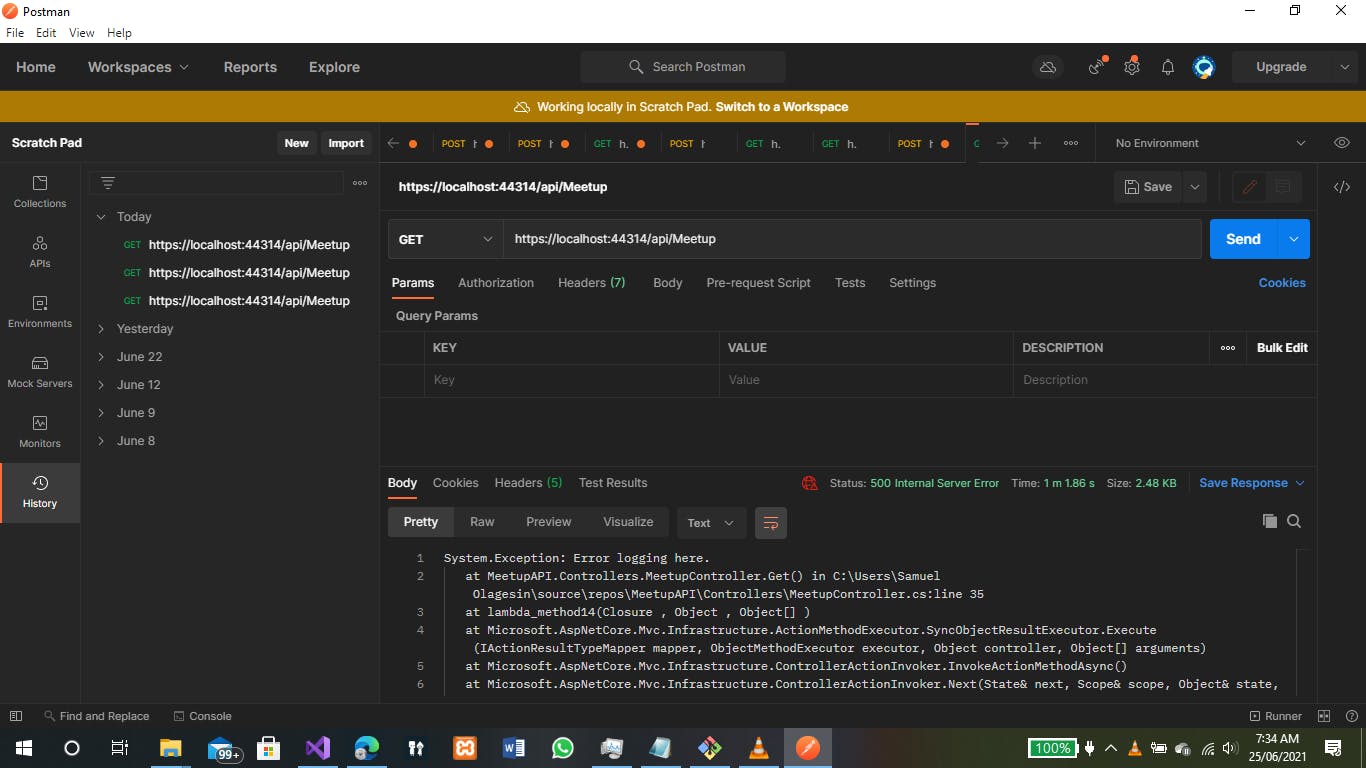
We then click on "continue" to allow the rest of the application to run, and we can also see our error on postman as shown below:
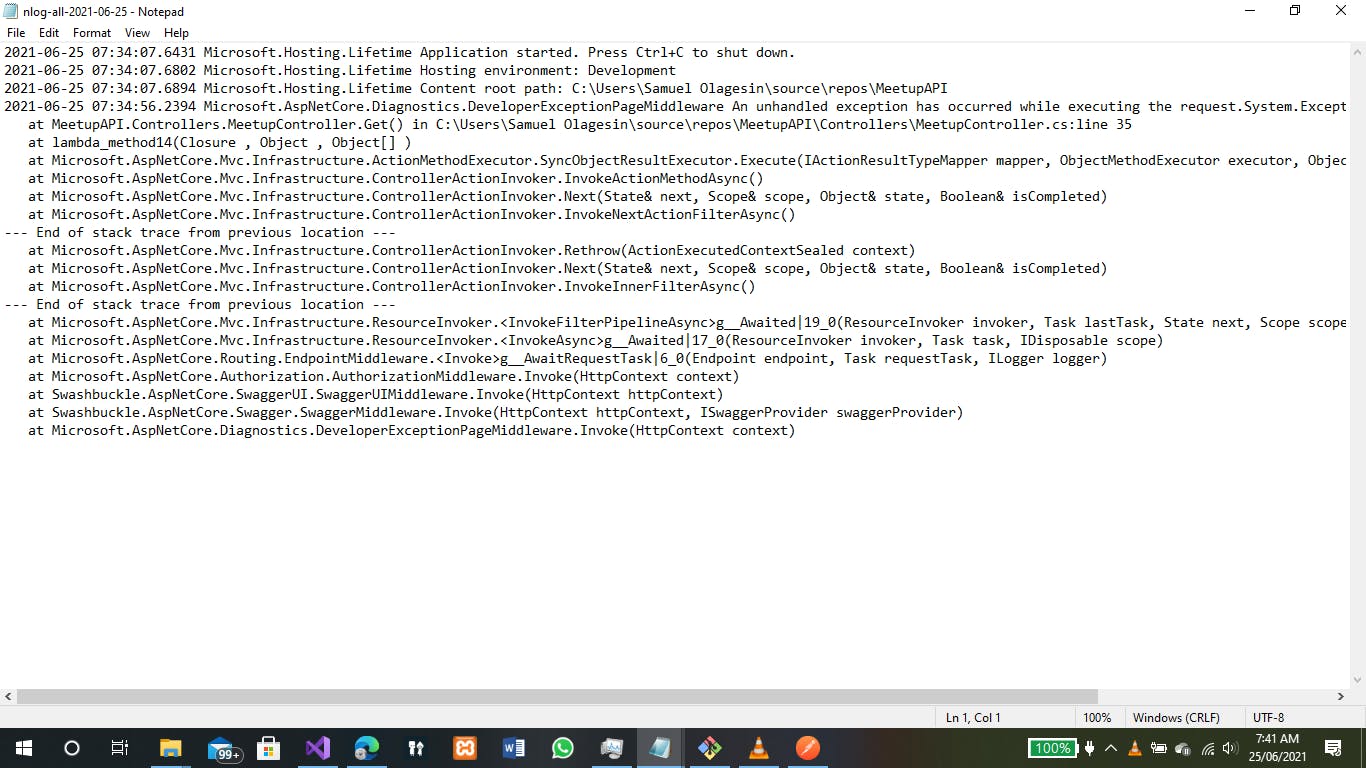
Next, to find our log file, we navigate to the directory we set in the nlog.config attribute fileName, and we can now see a "nlog-all-2021-06-25" file in the DemoLogs folder

Opening the log file allows us to view the log for the error which occurred at the point of testing on Postman, we can see that our exception from our application has now been written to the file which is saved on the local directory.
Now that we have a method to store our logs for future reference, we can continue working on our application knowing that we can revert to the logs whenever we need them.
Using NLog with the ILogger Interface.
Using the ILogger interface via dependency injection, we can log more than just errors to our log file. For example, we want to log information about when a new Meetup is being added. In our Meetup controller class, we inject the logger interface to enable us to use the logger with NLog.
        private readonly MeetupContext _context;
        private readonly IMapper _mapper;
        private readonly ILogger<MeetupController> logger;

        public MeetupController(MeetupContext context, IMapper mapper, ILogger<MeetupController> logger)
        {
            this._context = context;
            this._mapper = mapper;
            this.logger = logger;
        }
Next, in our controller method for creating new Meetups, we can invoke the logger.LogInformation() method in log to our file that a new Meetup has been added to our database.
        [HttpPost("Add")]
        public async Task<ActionResult<MeetupDto>> Create([FromBody]MeetupDto meetup)
        {
            if (!ModelState.IsValid)
            {
                return BadRequest(ModelState);
            }
            else {
                logger.LogInformation("A new meetup object is being added to the database");
                var meet = _mapper.Map<Meetup>(meetup);
                _context.Meetups.Add(meet);
                await _context.SaveChangesAsync();

                return Created("api/Meetup/" + meet.Name.Replace(" ", "-").ToLower(), null);
            }
        }
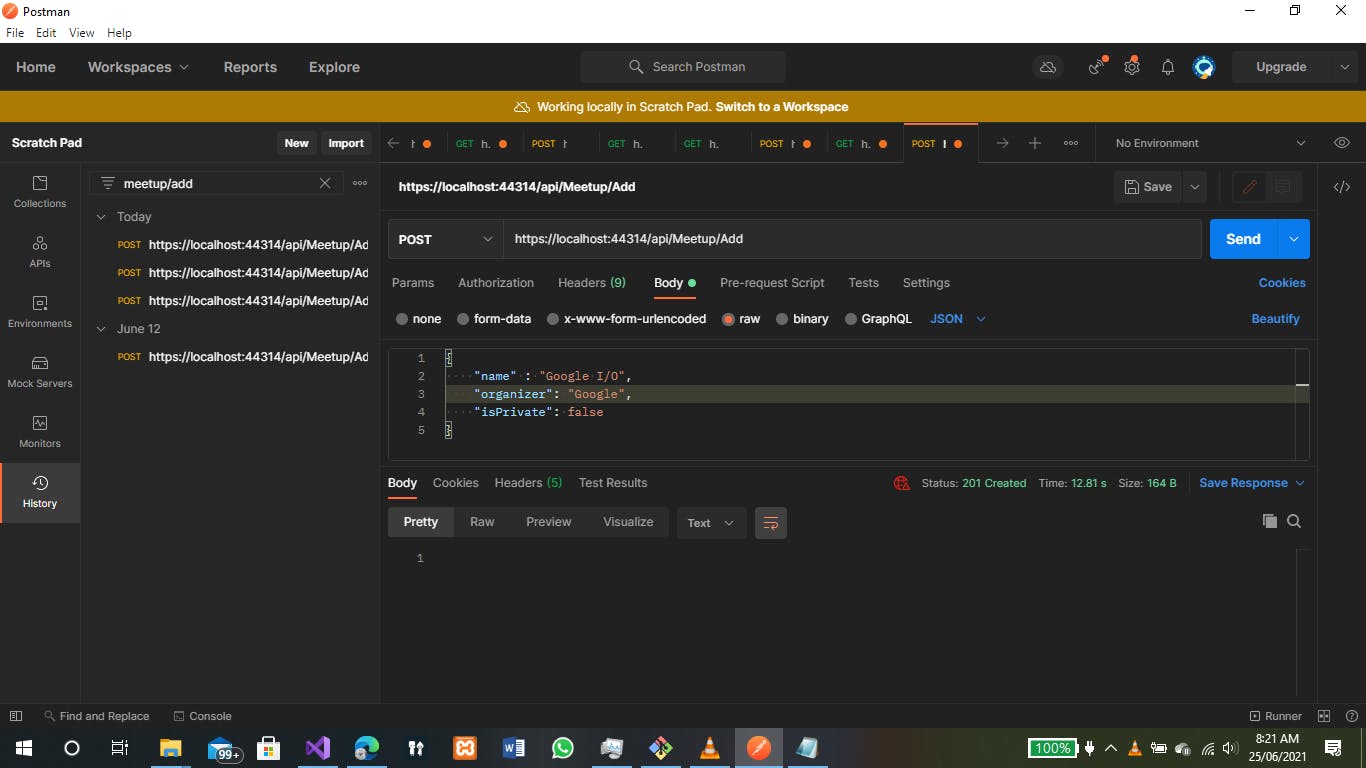
From Postman, when we call the endpoint and pass the data to create a new Meetup, we get the correct response as shown here.
When we check our log file in our directory, we can see our log information being added too:

This way, we have been able to log both intentional and unexpected exceptions that might occur in our application to our local directory. We can also follow this same reference to use other logging methods like sending email notifications whenever we log an issue or writing these logs to a database to view later.
Summary
All right then, we've been able to set up NLog, log errors and information to our local directory, use the ILogger interface with NLog via dependency injection to use other log properties, and reference other methods of logging in .NET Core Web API. We can see how useful logging can be in both Development and Production environments or our application, we can easily get access to log errors at specific times, and know how to solve them if the need arises.